|
|
马上注册,结交更多好友,享用更多功能,让你轻松玩转社区
您需要 登录 才可以下载或查看,没有账号?立即注册

x
国外网站上关于 PowerQuest Driver Image (symantec ImageCenter)程序的命令行选项解释与例子,高手们用它“一键还原/备份”
Drive Image Pro offers a scripting feature that allows you to automate
control of the program's operations with a text file of script commands.
Using this feature, system administrators can create and restore images
without user intervention.
The documentation accompanying Drive Image Pro explains the scripting
command syntax and gives a few examples of script files. This document is
intended to provide additional information for creating more complex
script files.
First, we will review the available options for launching Drive Image Pro
from the command line in scripting mode.
To invoke the command interpreter, use the /CMD=<script file> option. For
example, if the name of the text file containing the script commands was
C:\SCRIPTS\LABS.TXT, you would start Drive Image Pro in scripting mode by
typing:
PQDI /CMD=C:\SCRIPTS\LABS.TXT
at the command line or in your batch file.
Use the /IMG=<image file> switch to specify the name of the image file you
want to either create or restore. While many of the scripting commands in
the script file can be used without specifying this switch at the command
line, the STORE and RESTORE commands will encounter an error if this
option is not specified.
The /ERR=<error file> and LOG=<log file> switches are important for
viewing errors or checking results, since scripts execute commands without
any user intervention.
The /SCO switch is for Syntax Check Only. If this switch is specified, the
script file commands will not actually be executed, but each line of the
script will be checked for syntax errors. This is important when writing
and debugging the script file.
The /PWD=<password> switch instructs Drive Image Pro to encrypt the image
file you are creating and simultaneously designates the password that must
be entered before the image file can be restored. This password can be a
number or a string, but it must match the original password. The
/PWD=<password> switch does not encrypt images created using the STORE
script command.
The /CAS option is for users who need image every sector of their drives.
This switch will significantly slow down the imaging process, but the
resulting image will contain a copy of every sector in the imaged
partitions. It will also increase the size of the image.
If you want to save an image file to removable media that Drive Image Pro
can read from at the DOS level (for example, CD-R or Zip) but the image
file is too large to fit on a single disk or cartridge, you can use the
/MFS=<number of bytes> switch to split the image file into smaller
segments. When one image file segment reaches the specified size (which
can be a minimum of 10,000,000 bytes), Drive Image Pro closes that segment
and starts a new one. This process is repeated until all necessary data
has been imaged. You can then manually copy the image file segments to
removable media. The filename for each segment (except the first) is
consecutively numbered in the order in which it was created, so when it
comes time to restore the image file, simply insert the removable media in
the order prescribed by the number in the filename.
The /CBS and /NBS switches let you work with Drive Image Pro's Bad Sector
Checking feature. The /CBS switch turns sector checking on. The /NBS
switch turns it off. (Bad-sector checking is turned off by default.)
The /UEB switch forces Drive Image Pro to use the Extended BIOS for disk
reads and writes.
The /RAV switch is the equivalent of the Verify Disk Writes option in the
graphical version of Drive Image. It will significantly slow down the
restore process, but some people want the added security of verifying all
disk writes.
Important Note! Because scripts execute without user intervention, use
extra care when developing the script file. If the DELETE ALL command is
encountered, all the partitions on the currently selected drive will be
deleted without any warning or confirmation messages which would normally
allow the user to cancel the operation.
Script Command Syntax
------------------------------------
SELECT DRIVE 1
This command selects the first hard drive in the system. All script
commands following this command will be executed on this drive until
another SELECT DRIVE {Number} command is encountered.
SELECT PARTITION 2
This command selects the second partition on the currently selected drive.
Partitions are numbered in the order of their starting sector number on
the disk. The extended partition and any free spaces are not included when
counting partitions.
SELECT PARTITION D
This command selects the partition which DOS has assigned the drive letter
D:. Since DOS only assigns drive letters to visible FAT partitions, only
these types of partitions can be selected using this method.
SELECT PARTITION "DATA"
This command selects the first partition with the volume label DATA. If
more than one partition has this label (including FAT32, NTFS, and HPFS
partitions), only the first one is selected.
SELECT PARTITION FIRST
This command selects the first partition.
SELECT PARTITION NEXT
This command selects the partition immediately following the last selected
partition, regardless of the syntax used to select that partition.
SELECT PARTITION ALL
This command selects all the partitions on the currently selected drive.
SELECT FREESPACE FIRST
This command selects the first free space on the currently selected drive.
SELECT FREESPACE NEXT
This command selects the free space which follows the previously selected
free space.
SELECT FREESPACE LAST
This command selects the last free space on the currently selected drive.
SELECT FREESPACE LARGEST
This command compares the sizes of all free spaces on the currently
selected drive and selects the largest one. It does not matter whether the
free space is inside or outside of the extended partition.
SELECT IMAGE 3
This command selects the third image within the image file.
SELECT IMAGE ALL
This command selects all the images within the image file.
DELETE
This command deletes all the partitions selected using any of the SELECT
PARTITION commands.
DELETE ALL
This command deletes all the partitions on the currently selected drive
without requiring the partitions to be selected.
DELETE EXTENDED
The command deletes the extended partition. The extended partition can
only be deleted after all of the logical partitions have been deleted.
SECTOR CHECK ON
This command enables Bad Sector checking for all restore operations
following the command. It is an alternative to the command line switch
/CBS if you need bad-sector checking off for some partitions and on for
others.
SECTOR CHECK OFF
This command disables Bad Sector checking for all restore operations
following the command. It is an alternative to the command line switch
/NBS if you need bad-sector checking on for some partitions and off for
others.
SET ACTIVE
This command sets the last partition selected as the active partition
(meaning it will be the boot partition).
STORE
This command causes all selected partitions to be stored in the image file
without compressing them.
STORE WITH COMPRESSION OFF
This command causes all selected partitions to be stored in the image file
without compressing them.
STORE WITH COMPRESSION LOW
This command causes all selected partitions to be stored in the image file
using low compression.
STORE WITH COMPRESSION HIGH
This command causes all selected partitions to be stored in the image file
using high compression.
RESIZE IMAGE NO
This command prevents the last selected image from being resized when the
RESTORE command is encountered.
RESIZE IMAGE PROPORTIONAL
This command causes the last selected image to be resized proportionally
when the RESTORE command is encountered.
RESIZE IMAGE 500
This command causes the last selected image to be resized to 500 MB when
the RESTORE command is encountered.
RESIZE IMAGE MAX
This command causes the last selected image to be resized to the maximum
size possible. If this command is used in a situation where the partition
can take up the rest of the drive, then the partitions that you try to
restore after this one will fail because the drive will be full.
RESTORE
This command will download any selected images into the selected free
space and resize them according to the RESIZE commands.
REBOOT
This command reboots the machine. Any commands following this command will
not be executed since the machine is rebooted at this point.
Sample Scripts
-----------------------
All of the examples in this section use one of the following three setups:
Setup #1 - The machine has a single 500 MB drive containing just one FAT
partition.
Setup #2 - The machine has a single 1 GB drive and is partitioned into 3
partitions. The first partition is a 500 MB primary FAT partition. The
second and third partitions are each 250 MB logical drives (meaning they
are within the extended partition) and are FAT32 and NTFS, respectively.
Setup #3 - The machine has two hard drives. The first hard drive is
configured the same way as the drive in Setup #2, and the second hard
drive is 2 GB and contains 4 partitions--all 500 MB logical FAT
partitions.
Example #1: A user with Setup #1 wants to save his partition to a file
called MYDRIVE.PQI on drive M: (a network drive), and he needs to copy all
of the sectors on the drive. First, the user creates a script file called
A:\BACKUP.SCR. Next, the user adds the following commands to the script
file:
SELECT DRIVE 1
SELECT PARTITION 1
STORE
The user runs Drive Image Pro from the command line by typing:
PQDI /CMD=A:\BACKUP.SCR /IMG=M:\MYDRIVE.PQI /CAS
Example #2: A user with Setup #1 has replaced her 500 MB hard drive with a
2 GB hard drive and wants to restore the previously saved image to the new
drive. Since the drive is new, she wants to make sure that Bad Sector
Checking is turned off. The image is also password-protected. After
installing the new hard drive (which came already formatted with a FAT
partition on it), the user creates a script file called A:\RESTORE.SCR.
Next, the user adds the following commands to the script file:
SELECT DRIVE 1
// Delete the existing partition (Note: All comment lines in the script
file begin with a //)
DELETE ALL
SELECT FREESPACE FIRST
SELECT IMAGE 1
// Take up the whole drive, just like the original partition did.
RESIZE IMAGE PROPORTIONAL
RESTORE
The user runs Drive Image Pro from the command line by typing:
PQDI /CMD=A:\RESTORE.SCR /IMG=M:\MYDRIVE.PQI /NBS /PWD=q1234
Example #3: A user with Setup #2 wants to save all his partitions to a
file called MYDRIVE.PQI on drive M: (a network drive), but he wants to
split the image file so he can later burn it to CD-R disks for easy
backup. First, the user creates a script file called A:\BACKUP.SCR. Next,
the user adds the following commands to the script file:
SELECT DRIVE 1
SELECT PARTITION ALL
STORE
The user runs Drive Image Pro from the command line by typing:
PQDI /CMD=A:\BACKUP.SCR /IMG=M:\MYDRIVE.PQI /MFS=600000000
Example #4: The user from Example #3 has replaced his 1 GB hard drive with
a 2 GB hard drive and wants to restore the previously saved image to the
new drive. He wants to keep the primary FAT partition at its original
size, resize the FAT32 partition to 500 MB, and resize the NTFS partition
to 1 GB. After installing the new hard drive (which came already formatted
with a FAT partition on it), the user creates a script file called
A:\RESTORE.SCR. Next, the user adds the following commands to the script
file:
SELECT DRIVE 1
// Delete the existing partition
DELETE ALL
SELECT FREESPACE FIRST
SELECT IMAGE 1
RESIZE IMAGE NO
SELECT IMAGE 2
RESIZE IMAGE 500
SELECT IMAGE 3
RESIZE IMAGE 1000
RESTORE
The user runs Drive Image Pro from the command line by typing:
PQDI /CMD=A:\RESTORE.SCR /IMG=M:\MYDRIVE.PQI
Example #5: The user from Example #3 has replaced his 1 GB hard drive with
a 2 GB hard drive and wants to restore the previously saved image to the
new drive. He wants to keep the primary FAT partition at its original
size, and resize the FAT32 and NTFS partitions to take up the rest of the
hard drive in the same proportions they did on the original drive. After
installing the new hard drive (which came already formatted with a FAT
partition on it), the user creates a script file called A:\RESTORE.SCR.
Next, the user adds the following commands to the script file:
SELECT DRIVE 1
// Delete the existing partition
DELETE ALL
SELECT FREESPACE FIRST
SELECT IMAGE 1
RESIZE IMAGE NO
SELECT IMAGE 2
RESIZE IMAGE PROPORTIONAL
SELECT IMAGE 3
RESIZE IMAGE PROPORTIONAL
RESTORE
The user runs Drive Image Pro from the command line by typing:
PQDI /CMD=A:\RESTORE.SCR /IMG=M:\MYDRIVE.PQI
Example #6: A user with Setup #3 wants to save all her partitions to a
file called MYDRIVE.PQI on drive M: (a network drive) and compress the
image file to save space. First, the user creates a script file called
A:\BACKUP.SCR. Next, the user adds the following commands to the script
file:
SELECT DRIVE 1
SELECT PARTITION ALL
SELECT DRIVE 2
SELECT PARTITION ALL
STORE WITH COMPRESSION LOW
The user runs Drive Image Pro from the command line by typing:
PQDI /CMD=A:\BACKUP.SCR /IMG=M:\MYDRIVE.PQI
Example #7: The user from Example #5 wants to restore the previously saved
image to his drives. He wants to restore his NTFS partition to the second
drive instead of the first (changing its size to 500 MB) and not restore
the last FAT partition on the second drive. He wants the FAT32 partition
on the first drive to be expanded to take up the space the NTFS partition
previously occupied. He also wants to make sure the second disk is checked
for bad sectors during the restore process. First, the user creates a
script file called A:\RESTORE.SCR. Next, the user adds the following
commands to the script file:
SELECT DRIVE 1
// Delete the existing partitions
DELETE ALL
SELECT FREESPACE FIRST
SELECT IMAGE 1
RESIZE IMAGE NO
SELECT IMAGE 2
// Expand the FAT32 partition from 250 MB to 500 MB
RESIZE IMAGE 500
// Since only one free space may be selected at a time, we must restore
the first 2 images now
RESTORE
SECTOR CHECK ON
SELECT DRIVE 2
DELETE ALL
SELECT FREESPACE FIRST
SELECT IMAGE 3
// This is the 250 MB NTFS partition previously stored on drive 1
RESIZE IMAGE 500
SELECT IMAGE 4
RESIZE IMAGE NO
SELECT IMAGE 5
RESIZE IMAGE NO
SELECT IMAGE 6
RESIZE IMAGE NO
// Now restore the images to the second drive
RESTORE
REBOOT
The user runs Drive Image Pro from the command line by typing:
PQDI /CMD=A:\RESTORE.SCR /IMG=M:\MYDRIVE.PQI
Example #8: The user from Example #6 later realized that it was the third
FAT partition on the second drive instead of the fourth partition which he
did not want to restore. So now he wants to delete the last partition
(which DOS has assigned the drive letter F:) on his second drive and
replace it with the seventh partition in the image file. First, the user
creates a script file called A:\RESTORE.SCR. Next, the user adds the
following commands to the script file:
SELECT DRIVE 2
SELECT PARTITION F
// Delete the existing partition
DELETE
// There should only be one free space on the drive. If more than one is
available, be sure to select the largest one.
SELECT FREESPACE LARGEST
SELECT IMAGE 7
RESIZE IMAGE NO
RESTORE
The user runs Drive Image Pro from the command line by typing:
PQDI /CMD=A:\RESTORE.SCR /IMG=M:\MYDRIVE.PQI /CBS |
|


 狗仔卡
狗仔卡
 提升卡
提升卡 置顶卡
置顶卡 喧嚣卡
喧嚣卡 变色卡
变色卡 显身卡
显身卡
 文件删除数据恢复软件免费的有吗?大厂免费
 笔记本盘,企业盘,TP返修盘,服务器盘等特殊
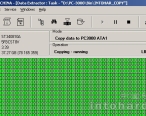 PC3000-Express镜像硬盘数据图文教程
 希捷ST500DM002硬盘数据恢复(DOS)Read Erro
 硬盘维修工具合集
 日立HUGO专修软件
 HDL 日立软件
 数据恢复解决方案分享
 ADATA方案分享
 IS最新型号TF的ecc和xor方案